Have you been looking for ways to transform your little one’s bedroom into a magical space they’ll never want to leave? Well, you’ve come to the right place. Creating a dreamy child’s bedroom ceiling design is one of the best ways to spark a child’s imagination and inspire sweet dreams. Whether your kid is fascinated by nature, enchanted by fairy tales, or intrigued by the night sky, there are endless ceiling themes to explore.
1- The Night Sky Ceiling: Stargazing From Bed
Creating a dreamy night sky ceiling is easy and magical for any child. To make a DIY version, you’ll need some basic supplies:
- Black paint or wallpaper for the ceiling and upper walls
- White paint for the constellations
- Paintbrushes
- Painter’s tape
- A star chart or constellation stencil
Once you have your supplies, clear the room and prep the ceiling by cleaning, lightly sanding, and applying a primer. Let it dry completely.
Next, apply two coats of black paint, waiting for each coat to dry in between. For extra dimension, paint the upper walls black as well, creating an immersive night sky effect.
Now for the fun part—adding the constellations! Use painter’s tape to map out the constellations on your ceiling based on a star chart. Then paint inside the tape with white paint. Peel away the tape carefully once the paint is dry.
Add some LED star stickers or string lights to the ceiling to create a magical twinkle. Dim the regular lighting in the room and voila! Your little one will love stargazing and dreaming the night away under their new night sky ceiling.
With some time and patience, you can create an imaginative DIY ceiling design transporting your child to a world of wonder and possibilities. A night sky ceiling is the perfect place to start, sparking a lifelong sense of discovery and adventure.
2- Interactive LED Stars: Twinkle, Twinkle Little Star

If your little one dreams of sleeping under the stars every night, interactive LED stars are a magical ceiling idea. With LED star projectors, you can transform your child’s bedroom ceiling design into a dazzling night sky.
To create this celestial scene, you’ll want an LED star projector that displays a field of realistic twinkling stars. Many models offer multiple color options, brightness levels, and rotating projection modes to keep things interesting. Some can even project constellations, nebulae, and galaxy images for an out-of-this-world effect.
Once you have your star projector, position it on the floor or a high shelf in the corner of the room. Aim it up at the ceiling, making minor adjustments until the stars are projected evenly overhead. For the best results, do this in a dark room. The darkness will make the stars appear brighter and more dramatic.
An interactive LED star ceiling is an easy, affordable DIY project that taps into a child’s imagination. Your little astronomer will love identifying constellations, making wishes on shooting stars, and dreaming up stories inspired by the night sky above. On cloudy nights when stargazing isn’t possible, this dazzling display is the perfect way to spark their curiosity about the wonders of the universe.
Who knew learning and play could be so effortlessly combined? With an LED star projector casting its glow, your child’s bedroom ceiling design will become a place of discovery and magic. Now that’s what we call a dreamy ceiling design!
3- Moving Clouds and Flying Birds: Imagination Takes Flight
a- A Ceiling Mural for Dreamers
This is one of the best ideas of your child’s bedroom ceiling design. Painting moving clouds, birds in flight, or other whimsical designs on your child’s ceiling is a magical way to spark their imagination and encourage dreaming. As they drift off to sleep, a custom ceiling mural provides visual interest and a sense of fantasy that little ones especially will love.
A child’s bedroom ceiling painted to look like a bright blue sky filled with puffy white clouds that appear to float and move is a whimsical choice. You can stencil the basic cloud shapes and paint them in, then once dry, go back and add highlights and shading with slightly different shades of blue to make them look more realistic and three-dimensional. Using the same technique, add birds soaring through the clouds for a whimsical touch.
For an underwater fantasy, paint fish swimming through seaweed and bubbles rising to the surface. A safari mural with giraffes grazing on trees and zebras running through the grasslands would delight any child fascinated by animals. Let your child help design the mural for an extra special customized ceiling they’ll enjoy for years to come.
Interactive details like glow-in-the-dark stars, LED string lights, fiber optic strands or ceiling fans with leaf-shaped blades can bring the ceiling mural to life. Place a few of these around the edges of the ceiling and in the center to create an enchanting scene when the lights are turned out for bedtime.
A custom ceiling mural is a DIY project that may require some patience but will give you an opportunity to bond with your child while sparking their creativity.With the right supplies and techniques, you can achieve a professional-looking result with this new small bedroom ceiling design that your child will always remember. Sweet dreams!
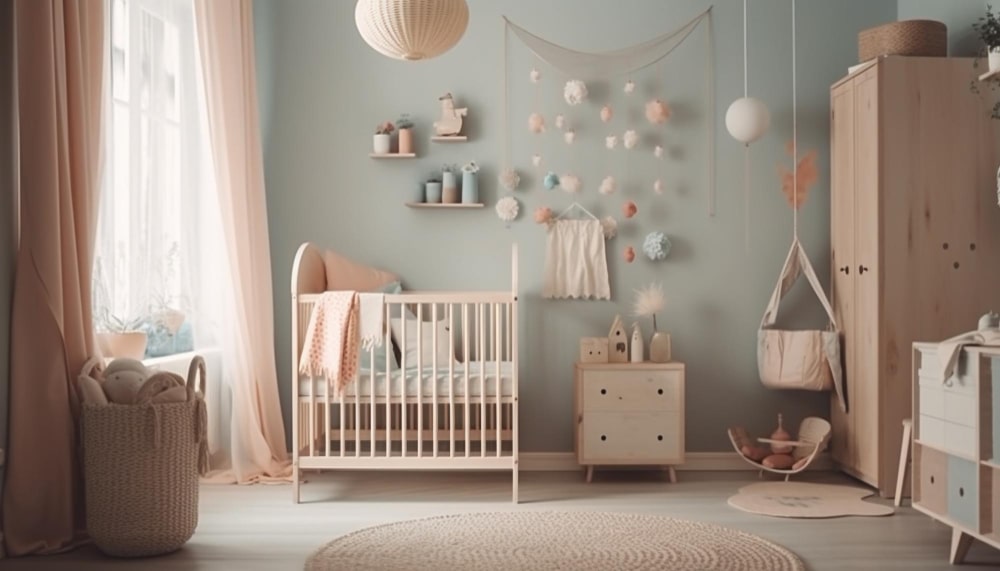
4- Fairy Tale Ceiling: Once Upon a Dream
This is the best ceiling design for a girl bedroom. A fairy tale ceiling transports your child to a magical realm of fantasy and wonder for ceiling design for bedroom.
Twinkle lights strung across the ceiling create a starry night effect. Use LED string lights or small globe lights for a whimsical glow without the heat. Group them together in constellations like the Big Dipper or Orion’s Belt to make a celestial scene.
a- Wandering fireflies
Battery-operated LED lights are perfect “fireflies” fluttering about the ceiling. Attach the lights to fine fishing line or transparent thread and suspend from the ceiling, spacing them out at different heights. Your child will love watching the magical lights dance above their head as they fall asleep.
b- Castle spires
For a fantastical castle look, attach cardboard cones or felt witch’s hats to the ceiling to form turrets and spires. Paint them in regal colors of red, blue and gold and embellish with gem stickers, ribbons, or puffy paint for extra whimsy.
c- Billowy clouds
Fluffy white pillow stuffing or cotton balls glued to the ceiling create the look of clouds drifting by. Group them together at different levels for a multi-dimensional effect. You can also paint the ceiling light blue for an open sky.
A fairy tale ceiling design for child’s bedroom stimulates your child’s imagination and sense of adventure. As the twinkling lights, dancing fireflies and castle spires lull them to sleep each night, your little prince or princess will dream of adventures in a faraway magical kingdom. A DIY project the whole family can participate in, a fairy tale ceiling creates cherished memories along with sweet dreams.
5- Rainbow Wonderland Ceiling: Over the Rainbow
This bedroom ceiling design is best for those kids who love colours or rain or maybe both. Creating a magical rainbow wonderland ceiling for your child’s room is simpler than you might think. With some basic supplies and a little imagination, you can transform an ordinary ceiling into an enchanting sky of color.
a- Gather Your Supplies
To create a rainbow wonderland ceiling, you’ll need:
- Paint: Red, orange, yellow, green, blue, indigo, violet
- Paintbrushes: 1-inch angled brushes and small detail brushes
- Paint tray
- Painter’s tape
- Drop cloths or tarp to protect the floor
b- Plan Your Design
Think about how you want to arrange the colors on the ceiling. Some options include:
- A traditional rainbow arching over the center of the ceiling
- Random splashes and swirls of color for a whimsical look
- Ombre fade from one color to the next
- Geometric shapes like circles, triangles or clouds in each color
Use painter’s tape to map out the outlines of your design on the ceiling before you start painting. This will ensure you end up with crisp edges and defined shapes.
c- Apply the Paint
To paint this child’s bedroom ceiling design, start with the lightest colors first – yellow, then orange, red and so on. Paint in sections, allowing each coat to dry for 10-15 minutes before painting adjacent areas. Use the detail brushes to paint the edges and outlines of your design.
d- Add Finishing Touches
Once the ceiling is dry, you can add details like:
- Puffy white clouds
- Glitter or confetti for some sparkle
- Glow-in-the-dark stars for nighttime magic
- Colorful mobiles or kites suspended from the ceiling
Stepping back to admire the finished rainbow wonderland ceiling design for kids bedroom, you’ll feel like you’re over the rainbow – without ever leaving home! This whimsical and colorful ceiling is sure to spark your child’s imagination.
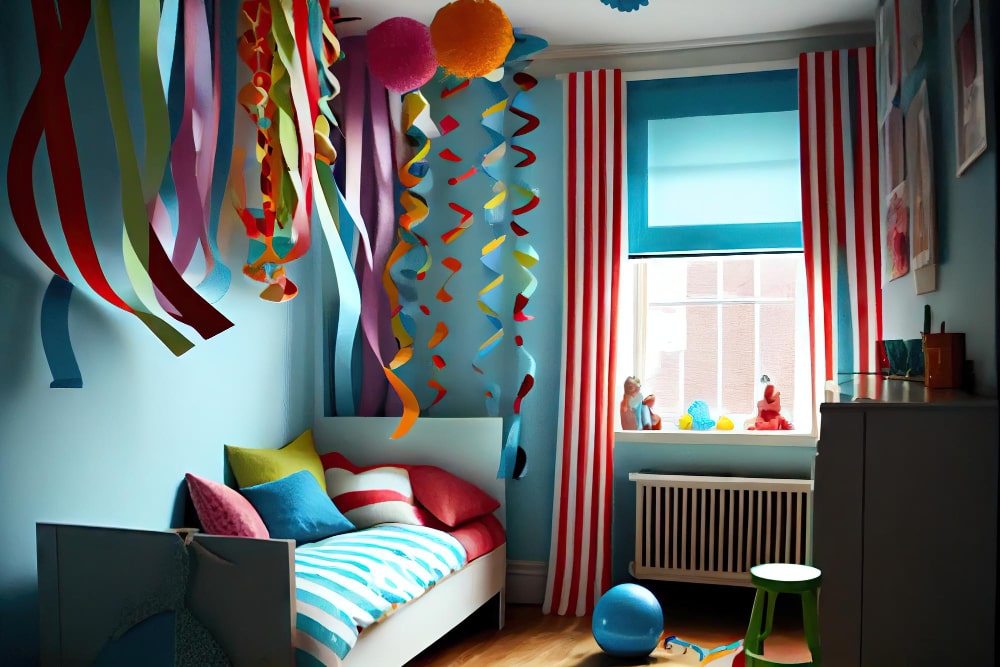
6- Balloon Ceiling: Up, Up and Away
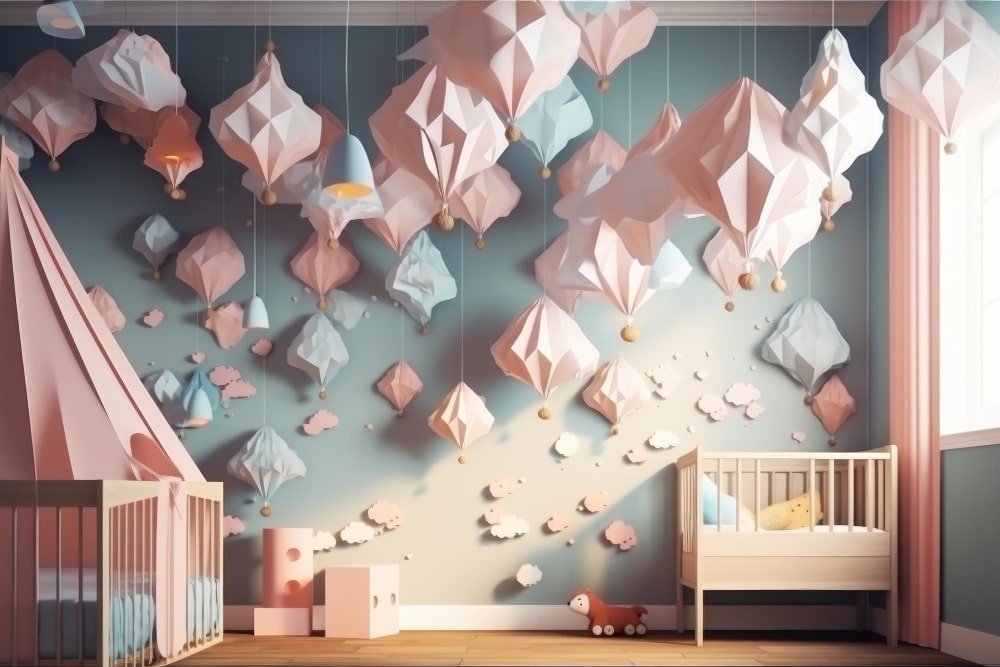
This is an unique idea for a child’s bedroom ceiling design. A balloon ceiling is a whimsical and playful option for a child’s room. To create the look, you’ll need a lot of balloons, string, tape and patience!
a- Gathering Supplies
You’ll want to buy several packs of balloons in your child’s favorite colors. Latex balloons work best for ceilings since they hold air longer. You’ll also need string, tape, scissors, a balloon pump and helpers.
b- Inflating the Balloons
Inflating 50-100 balloons can take awhile, so recruit friends or family members to help out. Blow up the balloons to different sizes for visual interest. Secure each balloon with string once inflated and tie off the end to prevent deflation.
c- Attaching the Balloons
There are a few ways to attach the balloons:
- Tape the balloons to the ceiling using double-sided tape or painter’s tape. This allows you to create shapes, letters or designs. Be very careful when taping to avoid popping any balloons!
- Tie strings to multiple balloons and attach the strings to fixtures like overhead lights, ceiling fans or cabinet knobs around the room. This gives the balloons a floating, whimsical look.
- Create balloon “bunches” by tying multiple balloons to one longer string and securing the string to the ceiling at multiple points. Space the bunches evenly apart for maximum impact.
d- Longevity
Latex balloons will typically last 2 to 5 days fully inflated. To keep your balloon ceiling looking its best, you may need to replace some balloons over time as they start to sag or pop. With regular replacement, a balloon ceiling can last up to 2 weeks.
A balloon child’s bedroom ceiling design is a super fun, whimsical project for a kids room. Your child will love falling asleep under a sea of colorful balloons floating overhead! With some patience and the help of friends, you can create a magical bedroom space your child will always remember.
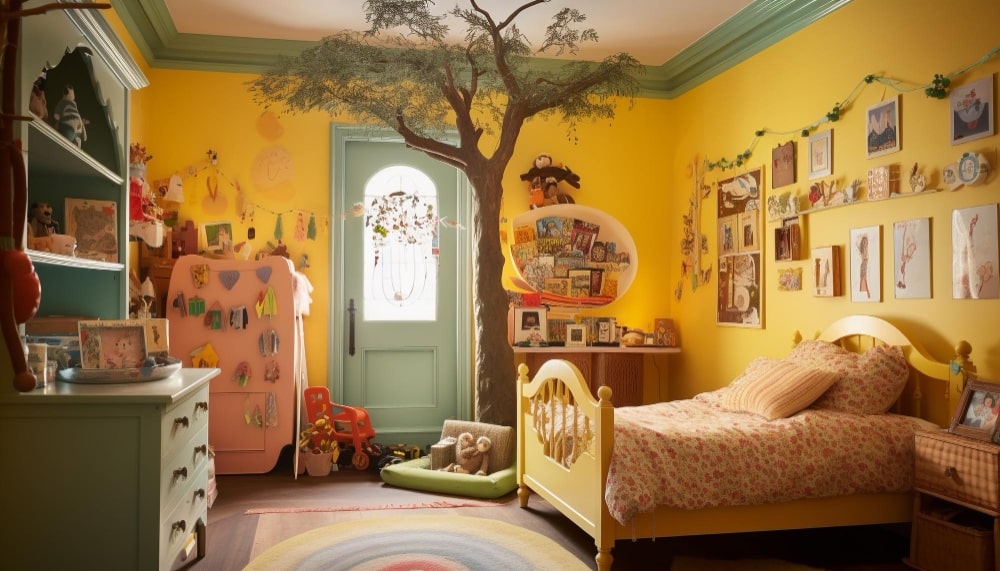
7- Tree Canopy Ceiling: Sweet Dreams in the Treehouse
a- Create a Leafy Oasis
If your child is a nature lover, this ceiling design idea for child’s bedroom is the one for you. A tree canopy ceiling will make your child feel like they’re sleeping under the stars in an enchanted forest. This whimsical design is perfect for any nature-loving little one.
To get started, paint the ceiling in a sky blue color. Once dry, use painter’s tape to map out the shape of tree branches spreading across the ceiling. With a darker shade of brown, paint free-form branch shapes that twist and turn, reaching up towards an imaginary treetop. Remove the tape to reveal your leafy framework.
- Add small clusters of green paper leaves or fabric felt leaves, adhering them to the ceiling along the branches using double-sided tape or craft glue. Group them closely together at the ends of branches to create a lush, full look.
- Include other woodland touches like string lights, silk flowers, or birds nests tucked within the branches. These little details will make the overall effect magical.
- For an interactive touch, add glow-in-the-dark stars or moon decals that your child can see shining through the leaves at night. This helps create their very own night sky peeking through the treetops.
b- Choose the right Bedroom Furniture
For this theme, natural wood bedroom furniture is best. If you are thinking of maintinaing a lot of free space, you can get a bed with storage. Also, fro making your child’s bedroom multifunctional, you can even try a sofa cum bed which can, in day time, turn your child’s bedroom into a perfect place to hang out with friends and later the same night provide all the comforts of a perfect bedroom.
A tree canopy ceiling is a sweet, whimsical way for a child to drift off to sleep while gazing up at a little piece of enchantment. The rustling leaves and dappled starlight are sure to inspire dreams of fantastical forests and woodland adventures. Creating this mural together can also be a fun weekend project, sparking creativity in both you and your little one. Most importantly, a customized ceiling like this helps make a child’s bedroom their own cozy sanctuary.
8- Oceanic Ceiling: Drifting Off to Sea
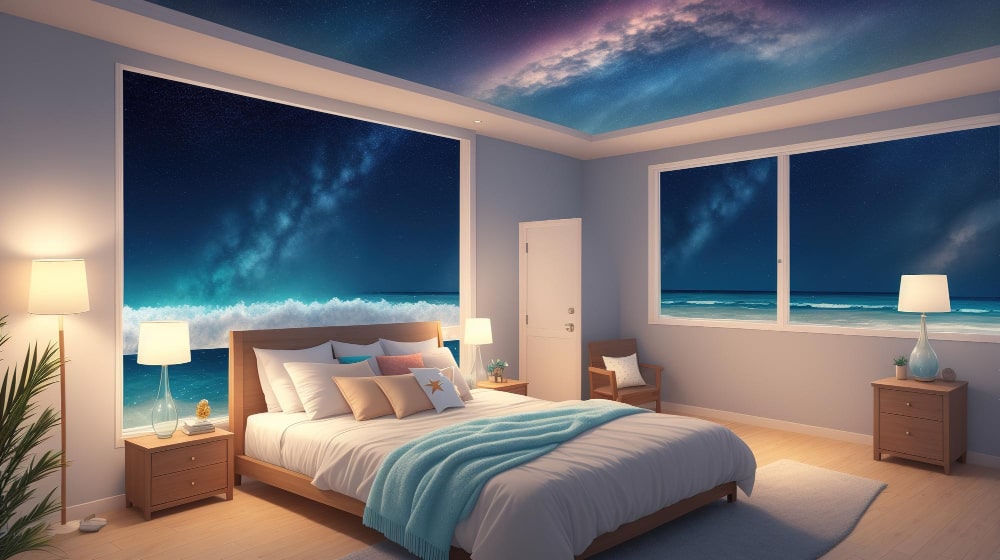
a- Paint the Ceiling Blue
This child’s bedroom ceiling design is for those who are adventurers by heart. To create an oceanic ceiling, start by painting the entire ceiling a rich blue color. A navy or cobalt blue works well to represent the deep sea. Use a paint with a matte finish to avoid too much shine. Let the blue ceiling be your blank canvas for adding ocean details.
b- Add White Clouds
Use a roller or paintbrush to add big, fluffy white clouds drifting across the blue sky. Make the clouds irregular shapes and sizes, clumping some together. The white clouds will provide contrast and make the blue ceiling pop.
c- Include Sea Life
What’s an ocean without sea creatures swimming about? Use stencils or freehand paint dolphins, whales, fish, seahorses, starfish, shells, and other marine animals. You can also adhere stickers or decals for a quick option. Arrange the sea life so some are swimming at different levels to create depth, while others peek out from behind clouds.
d- Dangle Fishing Nets or Buoys
Tie pieces of rope or twine to the ceiling to dangle down at varying lengths. Attach small weights to the ends to keep them hanging straight. You can also attach small fishing nets, glass or plastic buoys, or other nautical props to the ends of the ropes to complete the oceanic look.
e- Add a Sandy Beach
For the final touch, consider painting a strip of sand along the bottom of one wall to represent a beach. Use a tan or light brown color. You can even have the sea life and clouds extend onto the sand for a seamless transition from ceiling to wall.
An oceanic ceiling with rolling clouds, sea creatures swimming about, dangling ropes and props will transport your child off to a dream sea adventure every night. The possibilities for creativity are endless with this whimsical and educational ceiling design.
9- Constellations and Planets
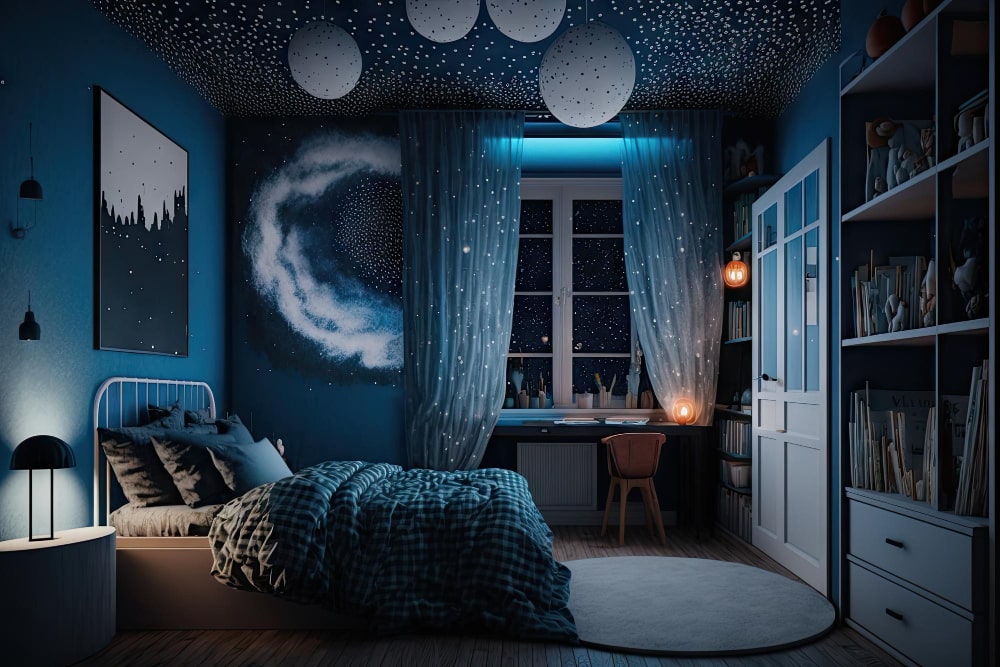
Does child wants to spread love up and above the sky, this child’s bedroom ceiling design is for you. Creating a dreamy night sky in your child’s bedroom is a magical experience. A constellation and planet ceiling is an interactive way to spark their imagination and interest in astronomy.
a- Supplies
- Glow-in-the-dark star and planet stickers
- String or fishing line
- Adhesive like double-sided tape
- A dark blue or black ceiling paint
b- Paint the ceiling
Paint the ceiling a dark color to make the stars and constellations pop. A midnight blue or black works well. Apply two coats to ensure an even, opaque finish. Let it dry completely.
c- Map out the constellations
Do some research on popular constellations like Orion, Ursa Major, and Leo. Get glow-in-the-dark stickers in various sizes to represent different stars. Use string to connect the stickers in the shape of the constellations. Secure the string in place with double-sided tape before sticking the stars onto the ceiling.
d- Add the planets
Include the planets in our solar system using larger glow-in-the-dark stickers. Place the sun, then Mercury, Venus, Earth and so on in order of distance from the sun. Connect them with string or fishing line for an added effect.
e- Turn off the lights
Once the ceiling is complete, turn off the lights for the full effect. The constellations and planets will glow brightly, fascinating your little astronomer. They’ll drift off to sleep under the starry night you created, dreaming of distant galaxies and space exploration.
With some DIY effort, you can create an interactive ceiling design teaching kids astronomy and capturing their imagination. A constellation and planet ceiling is an impactful, educational project making any child’s room extra special.
10- World Map ceiling
Have your kid has already identified himself or herself as a born traveller or nomad, then this cild’s bedroom ceiling design is best for them. A world map ceiling is a fun, educational design for a child’s room. As they drift off to sleep, their imagination can take them on adventures around the globe.
a- Choosing a Map
Select a map that fits your child’s age and interests. A basic political world map is simple but stimulating. For older kids, consider a physical map that shows terrain and landmarks. Or get a fun map like the ‘Here be Dragons’ medieval style. Look for a map with:
- Vibrant colors to capture their attention
- Clearly labeled countries, cities, rivers and seas
- Interesting illustrations like famous landmarks, animals or cultural icons
b- Application
There are a few ways to apply a world map to the ceiling:
- Wall decals: Large vinyl stickers that can be stuck directly to the ceiling. Easy to apply but may not last as long.
- Murals: Have an artist paint the map directly on the ceiling for a custom look. Requires professional installation.
- Fabric: Buy world map fabric and staple it to the ceiling. An inexpensive DIY option but wrinkles easily.
- Wallpaper: World map wallpaper comes in rolls that can be applied to ceilings. Requires wallpaper paste to install.
- Consider framing the map with wood trim or paint for a polished finish.
- Use a ceiling medallion or decorative trim in the center to draw the eye upward.
c- Inspiring Dreams
A world map ceiling ignites a child’s natural curiosity about different lands and cultures. As they fall asleep imagining distant places, they’ll wake up with a sense of wonder and adventure. A perfect design for any little explorer!
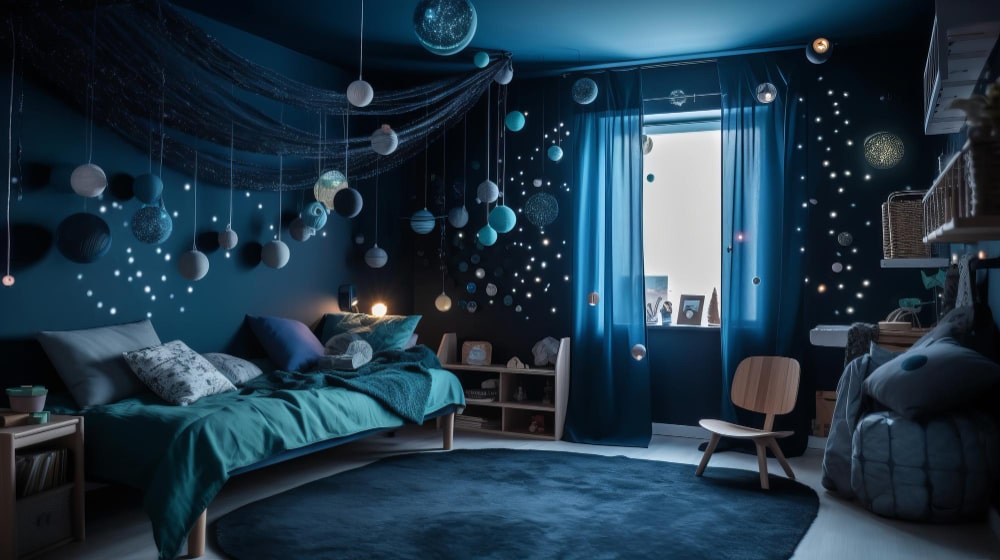
11- Solar System Ceiling
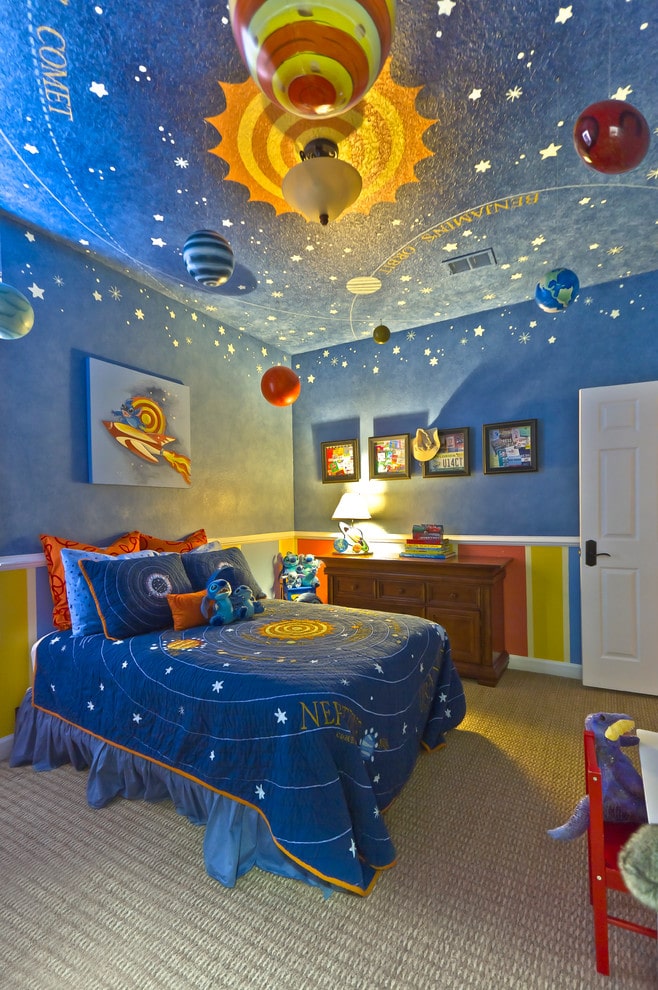
a- A Starry Night
A solar system ceiling is a dreamy and whimsical design perfect for a child fascinated by astronomy and space exploration. You can create an entire galaxy on the ceiling to spark imagination and fuel curiosity about the wonders of the universe.
To design a solar system ceiling, you’ll need supplies like glow-in-the-dark paint, stencils or stickers of the sun, planets and constellations, string, and small lights. Start with a dark blue base coat of paint on the ceiling to represent the night sky. Let it dry completely.
b- The Sun and Planets
Paint or stick the sun in the center, then add the planets in correct order from the sun using stencils or stickers. For extra realism, make the gas giants like Jupiter and Saturn noticeably larger than Earth and Mars. Use different sizes and brightness of glow-in-the-dark paint for each planet based on its prominence.
c- Constellations
Connect dots of glow-in-the-dark paint or stickers with string to form familiar constellations like Orion’s belt or the Big Dipper. Place them accurately around the solar system you’ve designed. The string representing constellations will glow in the dark, bringing the entire ceiling to life at night.
d- Twinkle, Twinkle
For a finishing touch, add small LED string lights, fiber optic strands or cordless mini lights to the ceiling to represent distant stars twinkling in the galaxy. Place them randomly around the solar system and constellations. At night when the ceiling is glowing, turn on the lights for a dazzling, interactive display of the cosmos.
A solar system ceiling is an magical space for a child to gaze up at before drifting off to sleep, dreaming of adventures among the stars. With some glow-in-the-dark paint and creativity, you can bring the wonder of the night sky indoors.
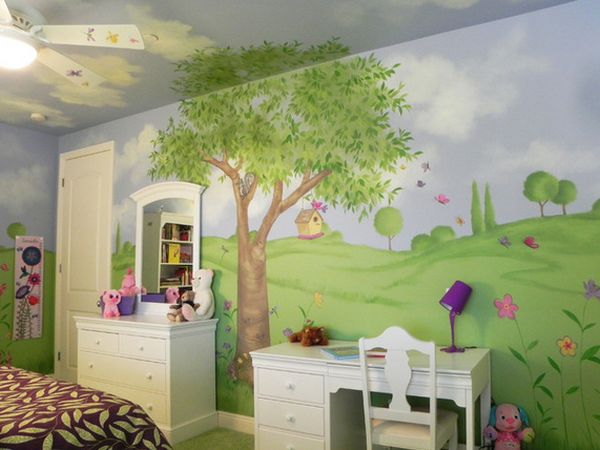
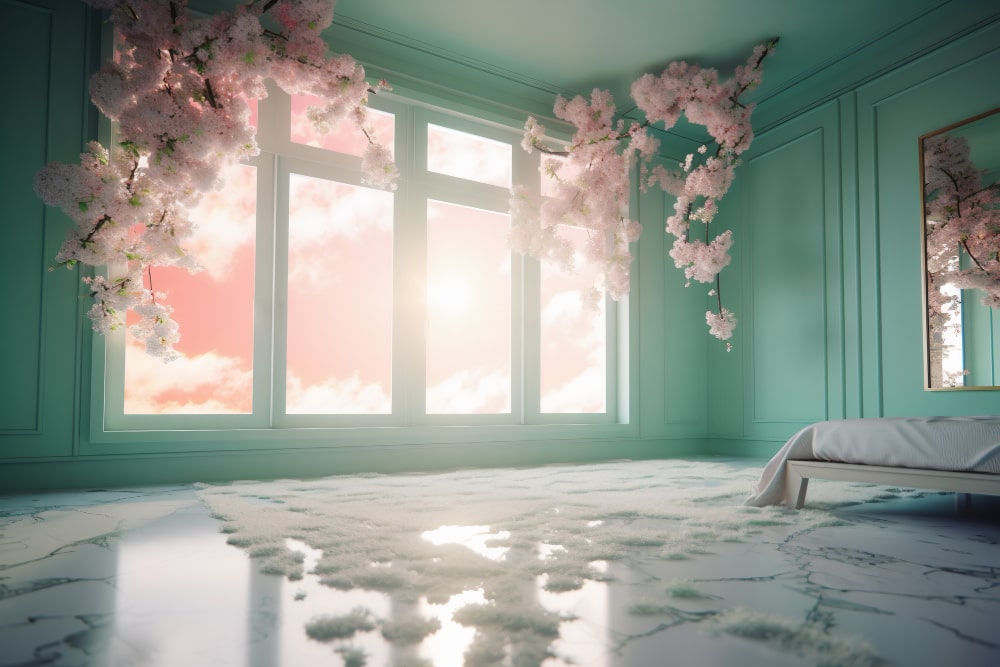
12- Garden Oasis Ceiling
a- Paint the ceiling sky blue.
A bright sky blue is perfect for creating an outdoor feel. Use a matte or eggshell paint and apply two coats for an even finish. For added depth, paint the ceiling darker at the edges and lighter in the center.
b- Add fluffy white clouds.
Use a stencil or freehand paint wispy clouds drifting across the ceiling. Keep the clouds varied in size and shape for a natural look. Use the same white paint you used for the walls or trim for continuity.
c- Include a lush green tree.
Nothing says garden oasis like a large tree. Paint an ornamental tree in the corner of the ceiling with branches that extend outwards. Use shades of green for the leaves and brown for the trunk and branches. Add shadows under the tree for dimension.
- Consider including birds, butterflies or dragonflies fluttering around the tree for an extra whimsical touch.
- You can also paint a trio of potted plants under the tree to complete the look.
d- String up lights for a dappled effect.
To mimic sunlight filtering through the leaves, string up small strand lights, fairy lights or lanterns and place them behind the tree, clouds and plants you painted. Turn the ceiling lights off and turn on the string lights for a magical effect.
e- Include natural wood accents.
For a final natural accent, you can glue wooden craft sticks to the edge of the ceiling to mimic a wooden fence. You can also spell out your child’s name or favorite word in wooden letters. The natural wood tones will complement the green and blue hues on the ceiling.
Transporting your child’s bedroom to an lush oasis retreat will spark their imagination and creativity. A garden-themed ceiling is a DIY project the whole family can participate in and one your child is sure to cherish for years to come.
FAQs
a- What types of ceiling designs are there for kids’ bedrooms?
There are so many fun options for a child’s dreamy ceiling. The possibilities are endless! Some popular choices include:
- Theme-based: Recreate the night sky, safari or ocean scene. These bring imagination to life.
- Interactive: Glow-in-the-dark stars, LED lights or moving components like clouds. Kids will love the interactivity.
- Whimsical: Fairy tale, rainbow or balloon designs. Whimsical ceilings make a space fun and fantastical.
- Nature-inspired: Tree canopy, garden or ocean. Bring nature indoors with an artistic, creative ceiling.
- Educational: Constellations, solar system or world map. Learning meets decor with an educational ceiling design.
b- How much do dreamy ceilings cost?
The cost of a ceiling design can vary greatly depending on the materials, complexity and whether you DIY or hire an artist. Some options like glow-in-the-dark stickers or decals start under $25. Stencils, paints and brushes to DIY a mural may cost $50 to $200. For a custom hand-painted mural by an artist, expect to pay $500 to $5,000 or more, depending on the detail and size of your ceiling.
c- Are dreamy ceilings difficult to create?
Some ceiling designs like stickers, decals or stencils can be easy DIY projects for a weekend. More complex murals may require an artistic hand, but with patience, the right supplies and a plan, an DIY mural is still achievable for most.
For interactive or educational ceilings, installation of lighting components will require electrical work best left to a professional. If a ceiling design seems too challenging, hiring an artist to paint a custom mural is a wonderful option to bring a dreamy ceiling to life.
The most important thing is choosing a ceiling that sparks your child’s imagination. With the right design and by keeping an open and creative mind, you’ll be gazing up at a dreamy, one-of-a-kind ceiling in no time!
d- What are some design tips for installing a ceiling fan in a small bedroom?
When designing a small bedroom with a ceiling fan, opt for a compact, low-profile fan with a blade span of 36 to 42 inches. Ensure proper clearance between the fan and surrounding objects, choose a flush mount for headroom, and select a design that complements the room’s décor. Consider integrated lighting for added functionality.
Take Away
So there you have it—plenty of creative ceiling design ideas to spark your child’s imagination. Whether you want to recreate the night sky, bring an enchanted forest indoors, or teach them about the solar system, the possibilities are endless. For smaller spaces, consider “pop small bedroom ceiling design” ideas to maximize impact without overwhelming the room.
Now, choose a theme that will delight your little dreamer, gather the necessary supplies, and create a ceiling masterpiece they’ll enjoy for years to come. Their bedroom will transform into a whimsical wonderland or a learning adventure, all while they sleep peacefully under a sea of glowing stars, floating clouds, or hot air balloons.
